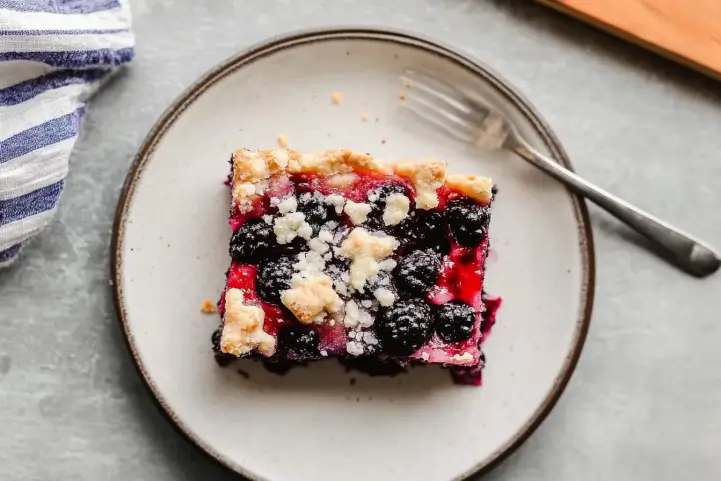
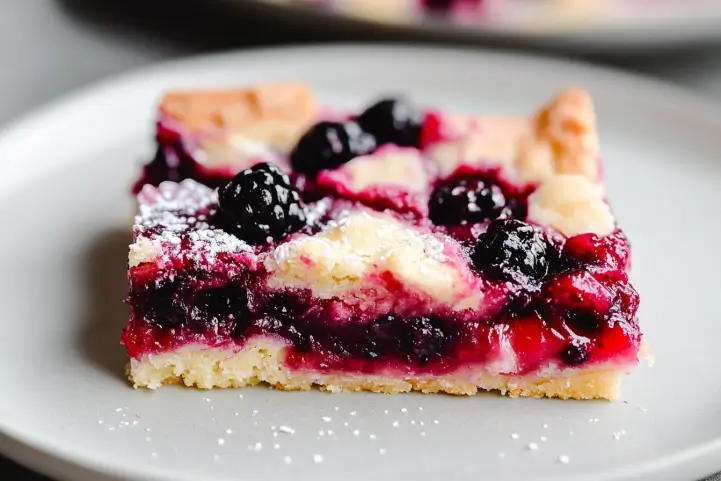
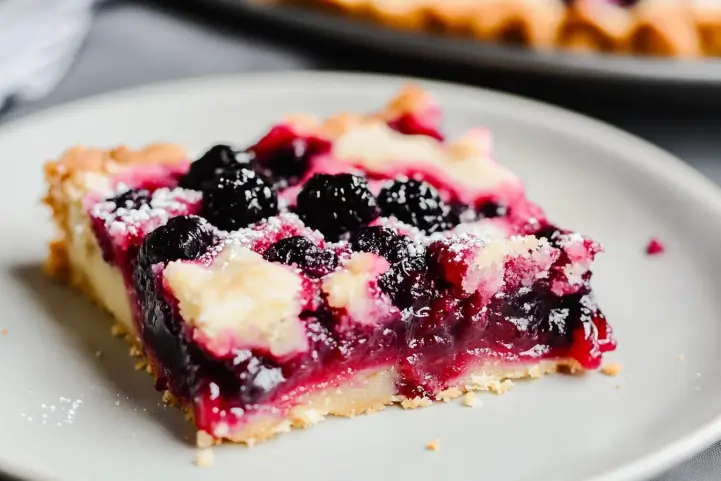
There’s something about the sweet-tart burst of blackberries that screams comfort to me. I remember the first time I tried making these blackberry pie bars—I was craving pie but didn’t feel like dealing with a finicky crust. These bars turned out to be the perfect solution: all the deliciousness of pie minus the hassle.
Whether you’re planning a family picnic or want a sweet treat to enjoy with your coffee, blackberry pie bars are a great choice. In this post, I’ll walk you through the steps to make them from scratch, share a few personal tips, and answer some common questions along the way.
Why You’ll Love These Blackberry Pie Bars
Easy to Make
Sometimes, you want a dessert that doesn’t require hours in the kitchen. These bars are super straightforward. No rolling out dough or fancy equipment is needed.
Bursting with Fresh Blackberry Flavor
If you love blackberries as much as I do, you’re in for a treat. Every bite is packed with juicy blackberries, and the lemon zest adds a bright pop of flavor that keeps things from getting too sweet.
Perfect Dessert for Any Occasion
I’ve made these for everything from casual family dinners to potlucks, and they’re always a hit. They’re easy to transport, too, so they’re great for taking along to gatherings.
Versatile Recipe
What makes this recipe so great is how easily you can customize it! Don’t have blackberries? No problem—raspberries, blueberries, or even peaches work beautifully.
Ingredients Needed for Blackberry Pie Bars
Here’s everything you’ll need to make these delicious bars:
For the Crust and Crumble
- All-Purpose Flour – This forms the base of the crust and gives it structure. You’ll also use it for the crumble topping.
- Granulated Sugar – It perfectly evens out the tangy flavor of the blackberries.
- Vegan Butter (Cold and Cubed) – Cold vegan butter is key for a crumbly, buttery texture.
- Oats (Optional) – If you like a heartier crumble, toss in some oats.
For the Blackberry Filling
- Fresh or Frozen Blackberries—I usually choose fresh when they’re in season, but frozen works great, too. Just thaw and drain them first.
- Lemon Zest and Juice – This adds a lovely brightness to the filling.
- Granulated Sugar – Adjust the amount depending on how sweet your berries are.
- Cornstarch – Helps thicken the filling so it doesn’t ooze out everywhere.
Flavor Enhancers
- Vanilla Extract – A hint of vanilla brings a cozy sweetness and rich flavor.
- Pinch of Salt – It might seem minor, but a little salt really brings out the flavors.
Step-by-Step Instructions for Making Blackberry Pie Bars
Step 1: Prepare the Crust
First, preheat your oven to 350°F (175°C) and line a baking dish with parchment paper. Trust me, this will make lifting the bars out later so much easier.
In a big bowl, combine the flour, sugar, and a pinch of salt. Add the cold, cubed butter and work it in with a pastry cutter (or just your hands) until the mixture resembles coarse crumbs. Press half of this mixture into the bottom of your prepared baking dish, making sure it’s packed down well.
Step 2: Make the Blackberry Filling
Now comes the fun part—the filling! Toss the blackberries in a bowl with the sugar, lemon zest, lemon juice, and cornstarch. Stir gently until the berries are fully covered. Spread the filling over the crust in your baking dish.
Step 3: Add the Crumble Topping
Sprinkle the rest of the crust mixture over the blackberry filling, crumbling it as you go. If you’re using oats, you’d mix them in here for some extra texture.
Step 4: Bake to Perfection
Put the dish in your preheated oven and bake for 35-40 minutes, until the top is golden and the filling is bubbling. Your kitchen will smell amazing!
Once done, let the bars cool completely before slicing. I know it’s tempting to dive right in, but letting them cool helps the filling set up nicely.

Tips for Perfect Blackberry Pie Bars
Use Cold Butter for a Flaky Crust
Cold butter is your best friend here. If it starts to soften too much while you’re working it into the flour, refrigerate the mixture for a few minutes.
Don’t Overmix the Crust Mixture
You want a crumbly texture, so stop mixing as soon as the butter is incorporated. Overmixing can make the crust tough.
Adjust Sweetness According to Taste
If your blackberries are extra tangy, you can add a little more sugar to balance the flavor. On the flip side, if they’re really sweet, you can cut back a little.
Let the Bars Cool Completely Before Slicing
This is the most challenging part, but it makes a huge difference. If you cut them while they’re still warm, they could crumble apart.
Storing and Serving Blackberry Pie Bars
Storing
- At Room Temperature: You can keep these bars in an airtight container on the counter for up to 2 days.
- In the Refrigerator: For more extended storage, pop them in the fridge. They’ll stay fresh for about 5 days.
Freezing
If you want to save some for later, wrap individual bars tightly in plastic wrap and place them in a freezer-safe container. They’ll keep for up to 3 months.
Serving Suggestions
These bars are delicious on their own, but if you want to take things up a notch, try serving them:
- Warm with a scoop of vanilla ice cream
- Drizzled with a simple lemon glaze
- With a dollop of whipped cream on top

FAQ Section About Blackberry Pie Bars
Can I use frozen blackberries for pie bars?
Definitely! I frequently turn to frozen blackberries when fresh ones aren’t available. Just make sure to thaw and drain them first so your bars don’t end up too watery.
How do I keep the crust from getting soggy?
Baking the bars until they’re golden brown and letting them cool completely before slicing helps prevent a soggy crust.
Can I substitute blackberries with other fruits?
Absolutely! This recipe works great with raspberries, blueberries, or even a mix of different berries.
How long do blackberry pie bars last?
They’ll stay fresh for up to 2 days at room temperature or 5 days in the fridge. For extended storage, simply freeze them, and they’ll remain fresh for up to 3 months.
Conclusion For Blackberry Pie Bars
I hope you’re as excited to make these blackberry pie bars as I was when I first tried them. They’re such a fun and delicious treat, and they always bring a little bit of joy to any occasion.
If you try this recipe, I’d love to hear how it turns out! Drop a comment below and share if you made any adjustments or swaps! If you enjoyed it, feel free to share it with friends and family who might love a homemade dessert.
Want more Bars recipes?
- Vegan Chocolate Matcha
- Vegan Pumpkin Cake Bars
- Vegan Sugar Cookie Bars
- Lavender Lemon Bars
- Salted Caramel Apple Bars

Blackberry Pie Bars
Ingredients
For the Crust and Crumble:
- 2 cups all-purpose flour
- ¾ cup granulated sugar
- ¾ cup cold vegan butter cubed
- ½ teaspoon salt
- ½ cup rolled oats optional, for added texture
For the Blackberry Filling:
- 3 cups fresh or frozen blackberries thawed and drained if using frozen
- ½ cup granulated sugar
- 1 tablespoon lemon zest
- 1 tablespoon lemon juice
- 2 tablespoons cornstarch
- 1 teaspoon vanilla extract
Instructions
- Preheat your oven to 350°F (175°C). Line a 9×13-inch baking dish with parchment paper, leaving a bit of overhang on the sides to make lifting the bars out easier later.
Make the Crust and Crumble:
- In a large bowl, mix the flour, white sugar, and a small pinch of salt.
- Add the cold, cubed butter and use a pastry cutter or your hands to work the butter into the dry ingredients until the mixture forms coarse crumbs. If you’re adding oats, mix them in now.
- Press half of the mixture firmly into the bottom of your prepared baking dish to form a solid crust.
Prepare the Blackberry Filling:
- In another bowl, toss the blackberries with granulated sugar, lemon zest, lemon juice, cornstarch, and vanilla extract. Gently toss the berries until they’re thoroughly and evenly coated.
Assemble the Pie Bars:
- Spread the blackberry filling evenly over the crust. Scatter the rest of the crumble mixture evenly over the berries.
- Bake in the preheated oven for 35-40 minutes until the top turns golden brown, and the blackberry filling starts to bubble.
- Please remove it from the oven and let the bars cool thoroughly in the dish before slicing.
- Once the bars have cooled, use the parchment paper overhang to lift them out of the dish easily. Slice into squares and serve.
Notes
- If your blackberries are lovely, reduce the sugar in the filling slightly.
- These bars can be made with other berries like raspberries or blueberries for a fun twist.
- To keep the bars fresh, store them in an airtight container at room temperature for up to 2 days or in the refrigerator for up to 5 days.