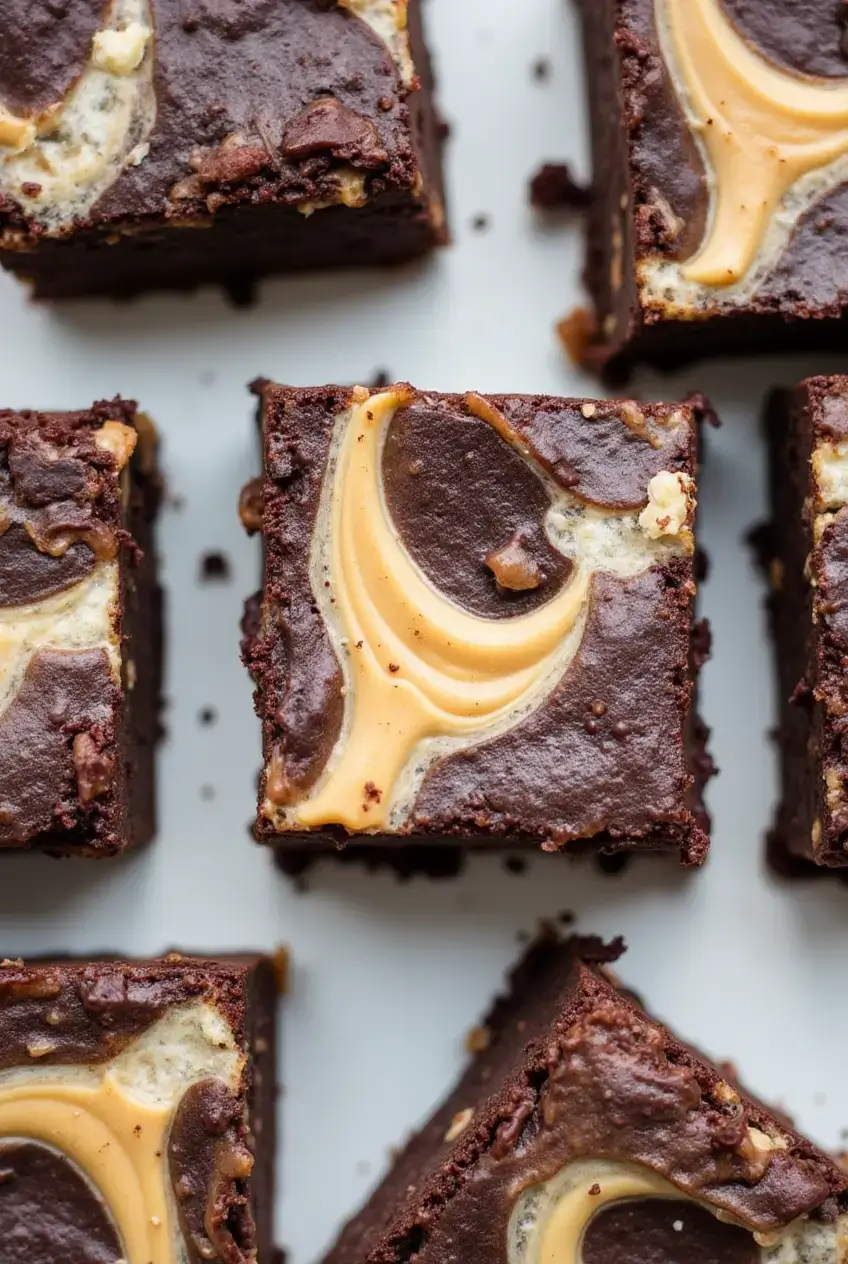
Have you ever craved something decadent and chocolaty, yet simple enough to whip up in no time? These vegan peanut butter swirl brownies deliver on all fronts—rich chocolate flavor, a creamy peanut butter swirl, and a fudgy texture that makes every bite heavenly. Whether you’re hosting a party or just indulging in a well-deserved treat, these brownies will leave everyone asking for more. Plus, they’re made entirely with plant-based ingredients, so you can enjoy them guilt-free!
What Makes These Brownies So Special?
1. Irresistibly Fudgy Texture:
Thanks to the perfect combination of coconut oil, almond milk, and maple syrup, these brownies turn out irresistibly fudgy. No dry or crumbly bites here—just rich, gooey goodness. This texture makes every bite melt in your mouth, providing the perfect balance of density and moistness.
2. Bold Chocolate Flavor:
Using high-quality cocoa powder and vegan chocolate chips guarantees a deep, bold chocolate flavor. It’s the kind of chocolatey treat that satisfies even the most intense cravings. The rich chocolate flavor is elevated by the slight sweetness of maple syrup, making these brownies taste gourmet without being overly complicated.
3. Eye-Catching Peanut Butter Swirl:
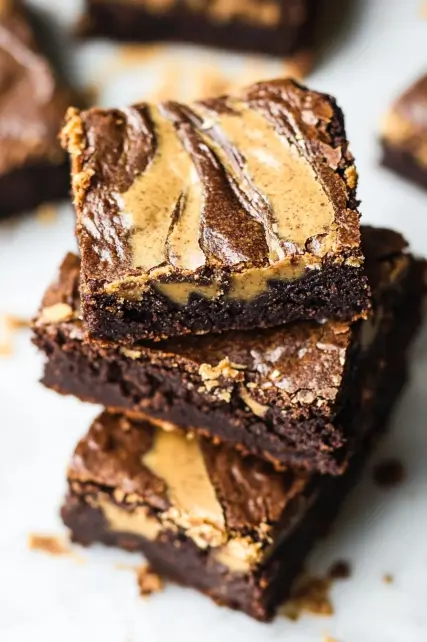
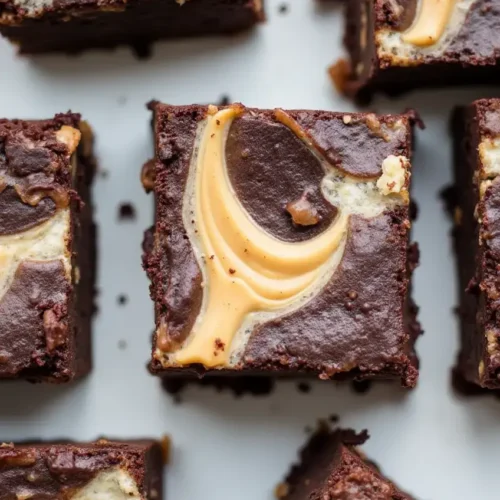
Not only does the peanut butter swirl add a beautiful visual contrast, but it also brings a creamy, nutty flavor that pairs perfectly with the chocolate. The swirl technique ensures that each bite has just the right hint of peanut butter, making it a treat that delights both the eyes and the palate.
4. Easy and Accessible Ingredients:
You don’t need fancy ingredients or special equipment—just a few pantry staples, a mixing bowl, and an oven. Whether you’re an experienced baker or someone new to the kitchen, this recipe is simple enough to follow without any hassle.
Ingredients For The Vegan Peanut Butter Swirl Brownies
Ingredients You’ll Need
You can easily gather these ingredients from your pantry or local store. Here’s what you need:
- All-purpose flour: The base for your brownies. You can also use a gluten-free blend if needed.
- Cocoa powder: Go for unsweetened, high-quality cocoa powder for the best flavor.
- Baking powder: Helps give the brownies a slight rise.
- Brown sugar: Adds sweetness and a touch of moisture.
- Almond milk: A great dairy-free alternative. You can substitute with any plant-based milk.
- Coconut oil: Keeps the brownies moist and rich. Melted vegan butter works too.
- Maple syrup: Enhances the sweetness naturally and adds depth to the flavor.
- Natural peanut butter: For that creamy swirl. Make sure it’s free from added sugars or oils.
- Vegan chocolate chips: Optional, but they make the brownies extra chocolatey.
If you want a more indulgent touch, you can experiment with add-ins like chopped nuts, dried fruits, or even shredded coconut for extra texture and flavor.
Instructions For Making Vegan Peanut Butter Swirl Brownies
Step 1: Preheat and Prepare
Start by preheating your oven to 350°F (175°C). Line an 8×8-inch baking pan with parchment paper, letting a bit hang over the edges to make lifting the brownies out a breeze. This will make it easier to lift the brownies out of the pan once they’re cooled and ready to slice.
Step 2: Mix the Dry Ingredients
In a large bowl, whisk together the all-purpose flour, cocoa powder, baking powder, and brown sugar until well combined. This helps spread the leavening agent evenly and keeps your batter smooth, preventing any lumps.
Step 3: Combine the Wet Ingredients
In another bowl, whisk the almond milk, melted coconut oil, and maple syrup together until the mixture is nice and smooth. Slowly pour the wet mixture into the dry ingredients, folding gently until just combined. Be sure to mix just until everything is combined, as stirring too much can change the texture of your brownies.
Step 4: Add the Batter to the Pan
Gently pour the brownie batter into your prepared baking pan and use a spatula to spread it out evenly. Ensure that the surface is level for even baking.
Step 5: Create the Peanut Butter Swirl
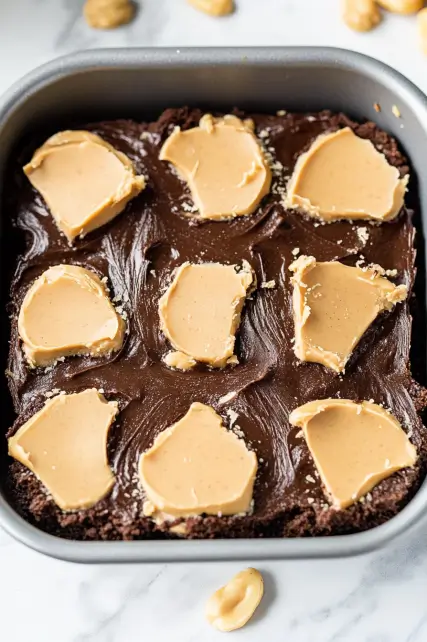
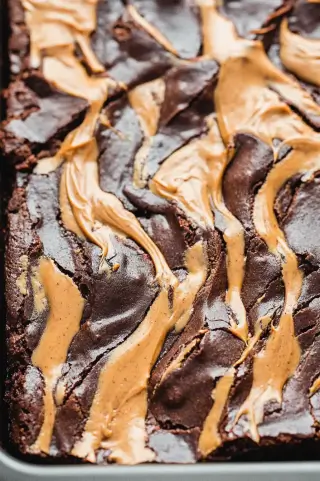
Drop spoonfuls of natural peanut butter across the top of the batter. Using a knife or skewer, gently swirl the peanut butter into the batter to create a marbled effect. Don’t overdo it—you want distinct swirls for the best visual appeal.
Step 6: Bake
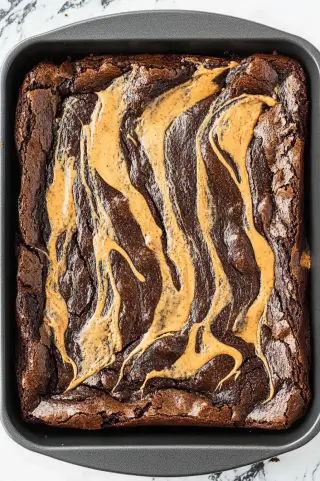
Place the pan in the preheated oven and bake for 25 to 30 minutes, keeping an eye on it as it cooks. Stick a toothpick into the center to see if it’s done baking. If you see a few moist crumbs on the toothpick, that means your brownies are perfectly baked! If it’s too wet, give it a few more minutes. Be careful not to bake them too long, or your brownies might turn out dry.
Step 7: Cool and Slice
When the brownies are done, take the pan out of the oven and let them cool fully right in the pan. This step is crucial for clean slicing and maintaining their structure. Grab a sharp knife and cut the brownies into squares or rectangles—whichever shape you like best!
Pro Tips for Perfect Vegan Peanut Butter Swirl Brownies
Use Room Temperature Ingredients
Bringing your ingredients to room temperature helps them blend more evenly, resulting in a smoother batter. This small step can make a big difference in the final texture of your brownies.
Don’t Overmix the Batter
Overmixing can lead to dense, tough brownies. Stir gently until everything is just mixed. It’s fine if there are a few small lumps—they’ll smooth out as the brownies bake.
Warm the Peanut Butter
If your peanut butter is too thick, warm it slightly before swirling. This makes it easier to create beautiful swirls and ensures even distribution.
Let Them Cool Completely
As tempting as it may be to dig in right away, letting the brownies cool completely ensures they set properly and makes slicing easier. For best results, refrigerate them for 30 minutes before slicing.
Use a Serrated Knife for Slicing:
A serrated knife cuts through the brownies more cleanly, especially if you added chocolate chips or nuts.
Variations to Try
1. Gluten-Free Option
Just swap out the all-purpose flour for a gluten-free flour blend, making sure it includes xanthan gum to help maintain structure.
2. Extra Nutty
Sprinkle chopped peanuts or walnuts over the batter before baking for added crunch. This variation adds a delightful texture and enhances the nutty flavor.
3. Double Chocolate
Mix in a handful of vegan chocolate chips for an extra chocolatey treat. You can never have too much chocolate!
4. Salted Peanut Butter Swirl:
Add a pinch of sea salt to the peanut butter before swirling for a sweet and salty flavor combination. This variation is especially popular for those who enjoy a contrast of flavors.
5. Espresso-Infused Brownies:
To give it a mocha flavor, mix a teaspoon of instant espresso powder into the dry ingredients. The coffee flavor enhances the chocolate, making it even richer.
FAQ Section About Vegan Peanut Butter Swirl Brownies
Can I make these brownies gluten-free?
Yes! Substitute the all-purpose flour with a gluten-free flour mixture. Ensure the blend includes xanthan gum to help with structure.
How do I store these brownies?
You can store them in an airtight container at room temperature for up to three days or in the fridge for up to a week for longer storage.
Can I freeze these brownies?
Absolutely! Individually wrap each brownie in plastic wrap and store them in a freezer-safe bag. They can be stored in the freezer for as long as three months. Thaw at room temperature before serving.
Why are my brownies dry?
Overbaking is often the cause of dry brownies. To prevent this, check them a few minutes before the suggested baking time.
Can I use other nut butter?
Yes! Feel free to swap peanut butter with almond butter, cashew butter, or sunflower seed butter to create a unique flavor profile.
Conclusion Vegan Peanut Butter Swirl Brownies
These vegan peanut butter swirl brownies are everything you want in a dessert—rich, fudgy, chocolaty, and beautifully swirled with creamy peanut butter. They’re easy to make, completely plant-based, and sure to impress anyone who tries them. Whether you’re an experienced baker or new to vegan baking, this recipe is a must-try.
Want more Recipes like this ?
Vegan Peanut Butter Swirl Brownies
Ingredients
- 1 cup all-purpose flour or gluten-free blend
- ½ cup unsweetened cocoa powder
- 1 teaspoon baking powder
- ¾ cup brown sugar
- ¾ cup almond milk or any plant-based milk
- ½ cup melted coconut oil or vegan butter
- ¼ cup maple syrup
For the Swirl:
- ½ cup natural peanut butter
- 1 tablespoon maple syrup optional, for extra sweetness
Optional Add-Ins:
- ½ cup vegan chocolate chips
- ¼ cup chopped nuts walnuts or pecans
Instructions
- Preheat your oven to 350°F (175°C). Cover an 8×8-inch baking dish with parchment paper, ensuring a bit of overhang on the sides to make lifting out the dessert easier.
- In a large mixing bowl, whisk together the all-purpose flour, cocoa powder, baking powder, and brown sugar until well combined.
- In a separate bowl, whisk the almond milk, melted coconut oil, and maple syrup until smooth.
- Gradually add the wet mixture to the dry ingredients, pouring it in slowly.
- Gently fold until just combined. Take care not to overmix, as doing so may compromise the brownies’ texture.
- Evenly distribute the brownie batter in the lined pan using a spatula.
- Add spoonfuls of peanut butter on top, spacing them across the surface. Drag a knife or skewer through the peanut butter and batter to create a swirled, marbled pattern.
- Bake in the preheated oven for 25-30 minutes. Test for doneness by inserting a toothpick into the center—it should emerge with a few moist crumbs clinging to it, but without any wet batter.
- Allow the brownies to cool completely in the pan before slicing. For cleaner slices, refrigerate them for 30 minutes before cutting.
Notes
- To make a gluten-free option, substitute with a gluten-free flour blend that includes xanthan gum.
- If your peanut butter is too thick, warm it slightly before swirling to create smoother swirls.
- Store the brownies in an airtight container at room temperature for up to 3 days, or keep them in the refrigerator where they’ll stay fresh for up to a week.
- You can freeze individual brownie slices for up to 3 months; just wrap them tightly in plastic wrap and store in a freezer-safe bag.
